Very comprehensive features. I’ve used elite package for a long time. Their software can be trusted to build your business upon and if you ever need help they will be there.


Last updated on July 15, 2025 by fatstash Team
How to Upload Files to Dropbox from Your WordPress Forms
Looking for the easiest way to allow others to upload files from your WordPress Dropbox forms? We have the answer!
A Dropbox account can be an important resource for your WordPress website. Cloud storage often holds critical documents for your organization, such as your customer sign-up form responses. However, manually uploading each entry individually takes a lot of effort.
Fortunately, using automated processes can save you time and energy. Uploading files from WordPress to Dropbox lets you to organize your documents as they’re submitted. If you’re asking yourself "How do I allow others to upload to my Dropbox?", you'll be happy to know you can use the Dropbox integration through the free third-party tool Zapier.
In this article, we’ll show you how to upload files to Dropbox in just two easy steps. Let’s dive in!
Step 1: Set up your Fatstash trigger
Before you begin, make sure you have a Zapier account connected to your fatstash Business plan or higher. You’ll also need a Dropbox account.
Also, you'll need to create a contact form with a file upload field on your WordPress site. This file upload field is the one you'll be sending to Dropbox. Any files uploaded here will also be saved in your WordPress media library. This also means other Dropbox plugins for WordPress would also be able to help you achieve the same goal.
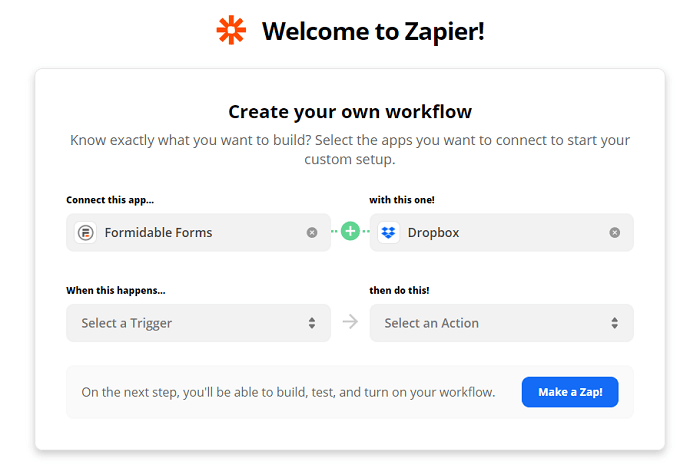
When your accounts are all ready, open up Zapier and go to the dashboard. Find the box titled Create your own Workflow.
In the Connect this app field, choose Fatstash. Then choose Dropbox in the second field. This will enable you to create a trigger:
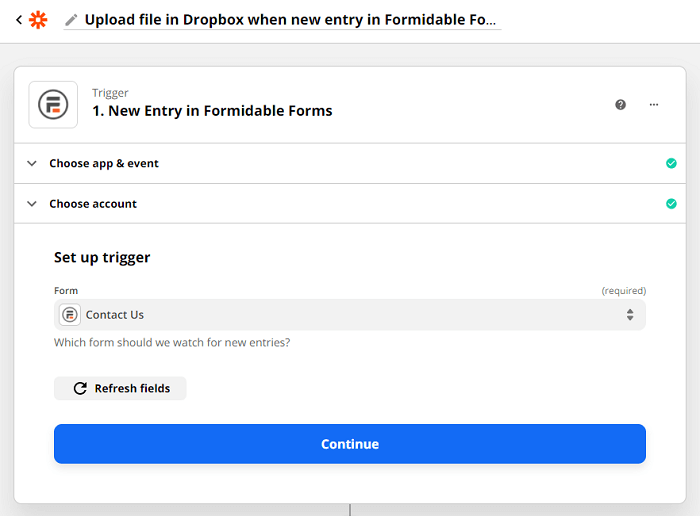
For our example, we'll upload each new form submission to Dropbox. To do so, select New Entry in the first field and Upload File in the second. After that, click on Try it:

Next, select the name of the upload form that you want to upload to Dropbox in the empty field, and click on Continue:
Finally, you can test your trigger to see if it works correctly. Just click on the blue Test Trigger button. Then you'll receive your results:

If the test fails, you can adjust your settings or try again. When you’re done, click on Continue to move to the next step.
Step 2: Select your Dropbox action
Next, you can choose what your trigger will make Dropbox do. We chose Upload File in the last step. However, you can also change the action event at this stage:

Make your choice and click on Continue. You’ll then be asked to link your Dropbox account. Sign in when prompted, and select Continue again.
You’ll then see a few fields titled Set up action:
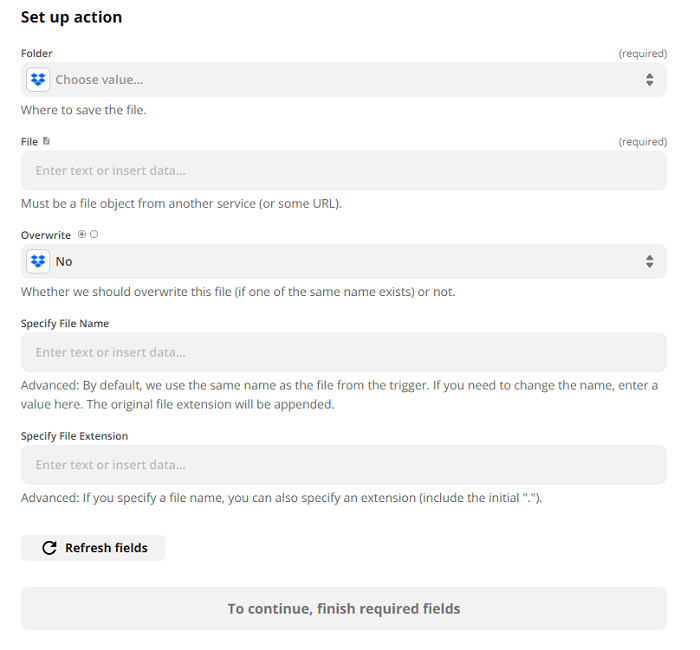
These settings will apply to all future actions related to your trigger. Take some time to consider these crucial fields, such as double-checking where you'll be saving your entries. Customizing this setting could be helpful if you have a specific Dropbox folder for your Dropbox forms.
In the File setting field, select the name of your file upload field. The Dropbox file name can be whatever you'd like it to be. Alternatively, you can create a file with a combination of the data in the form.
After you fill these fields out, you can test the Dropbox connection:
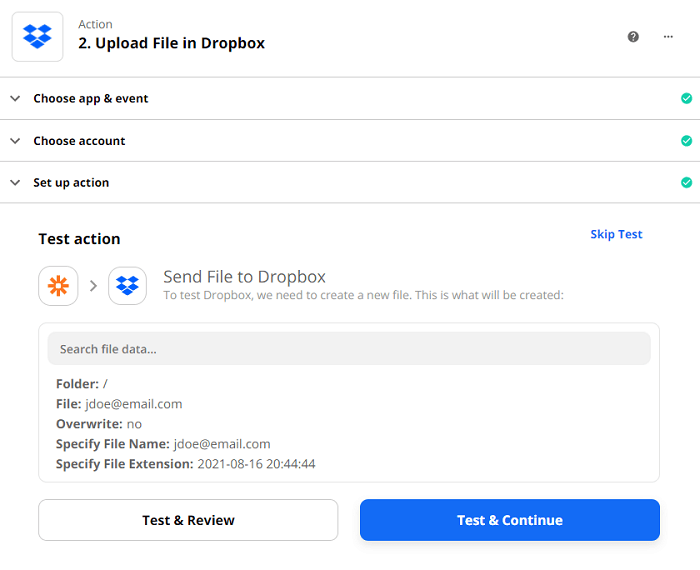
Select either Test & Review or Test & Continue to see if your connection works. You can also click on Skip Test to move on.
If you decide to test, you may see a screen similar to the following. If the test was successful, choose Turn on Zap to complete the process:
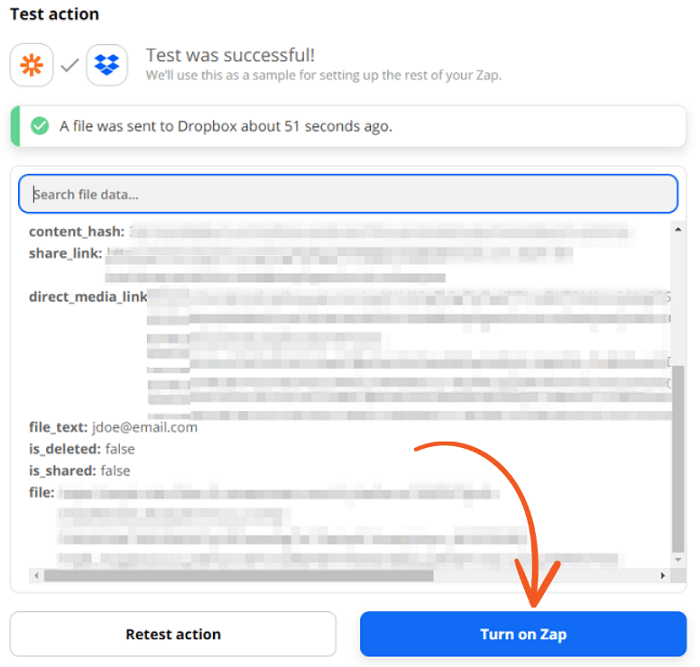
Finally, you should see the following success screen:

New WordPress form entries should now upload directly to Dropbox. If you want to add more rules, you can repeat this process for different triggers and actions.
Upgrade your WordPress site with powerful, flexible forms.
Wrapping up WordPress Dropbox forms
Using automated processes between your business platforms can save you a lot of time. For example, you can easily connect your WordPress and Dropbox accounts to store Fatstash entries.
In this article, we showed you how to upload files to Dropbox using Zapier:
- Set up your chosen Fatstash trigger.
- Select which action Dropbox will do in response.
Uploading to Dropbox isn’t the only way Fatstash can streamline your site. Check out a few of our other powerful integrations today for the best WordPress form builder!
Read more about uploading files in WordPress
 How to Use WordPress to Upload Files to Google Drive
 How To Create a WordPress Contact Form with File Uploads
 5 Best WordPress Plugins To Download PDF Files (& Upload PDFs Too)
This article may contain affiliate links. Once in a while, we earn commissions from those links. But we only recommend products we like, with or without commissions.