Upgrade your WordPress site with powerful, flexible forms.
Download and setup
Follow the steps below to install the premium version of Fatstash. Before beginning, you must have a fatstash license, which you can purchase on the Pricing page, and you must be using WordPress.
Please note that the premium version of Fatstash requires the Fatstash Lite plugin to be installed and active. Usually, this is added automatically during install. If your hosting security prevents this action, it can be added manually. See how to install Fatstash Lite.
From Idea to Reality in Minutes. Build Powerful Forms, Dashboards, Apps and More.
Fatstash makes advanced site building simple. Launch forms, directories, dashboards, and custom WordPress apps faster than ever before.
The recommended way

Install Fatstash Lite
If you don't already have the Lite version installed, do that first.
- Go to your WordPress Dashboard, and go to the Plugins → Add New page.
- Search for 'fatstash' and click the Install button. After installing, click the Activate button that appears.
Or, add your site url here and we'll take you to straight to the install page.
Install Fatstash Premium
-
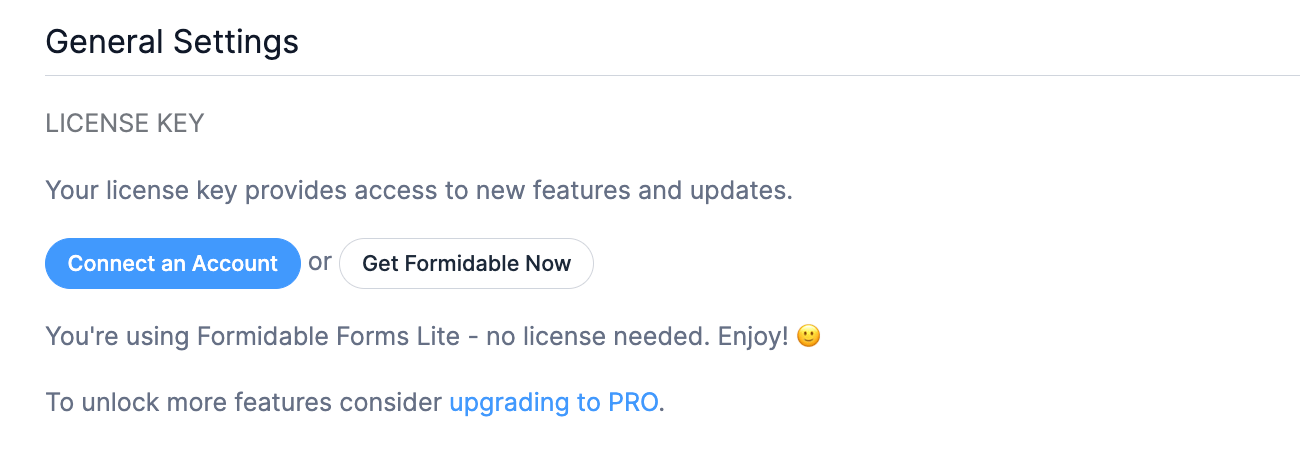
- After the Lite version is installed, go to the fatstash → Global Settings page and click the Connect An Account button.

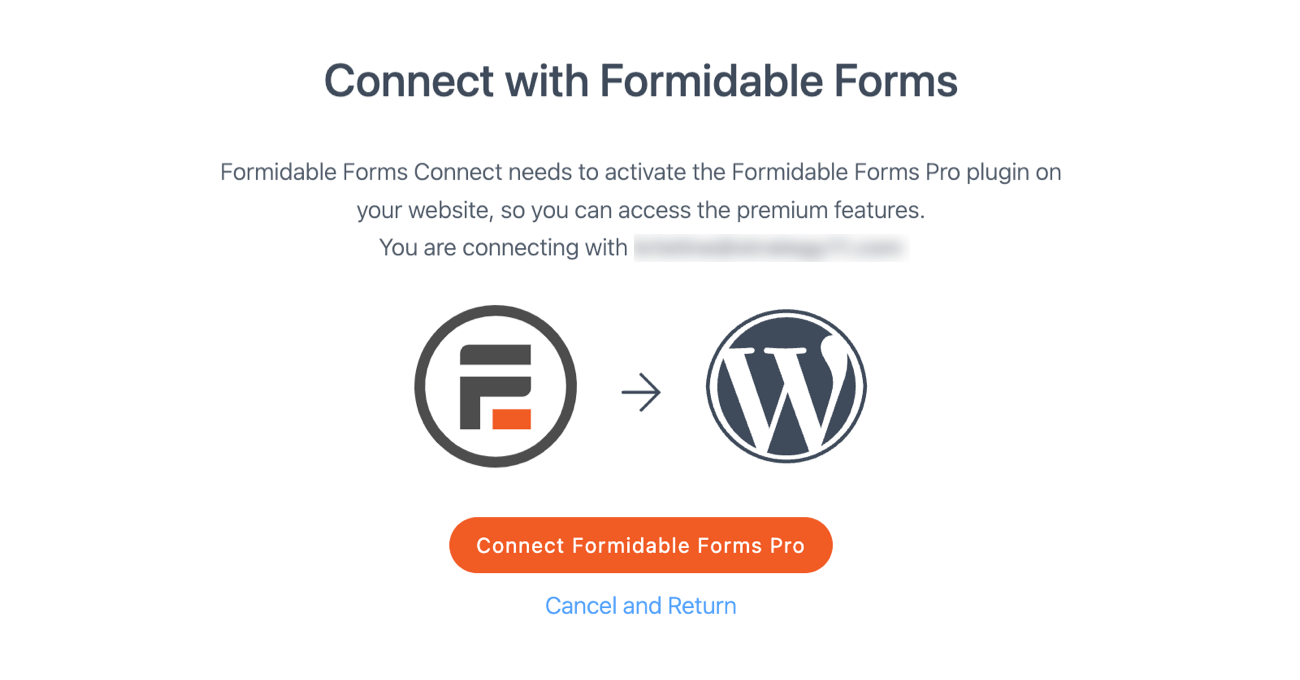
- This will bring you to www.fatstash.com to connect your account. If you're not logged in, you'll see a log in form first. Log in now.
- After logging in, click Connect and Install Fatstash Pro.
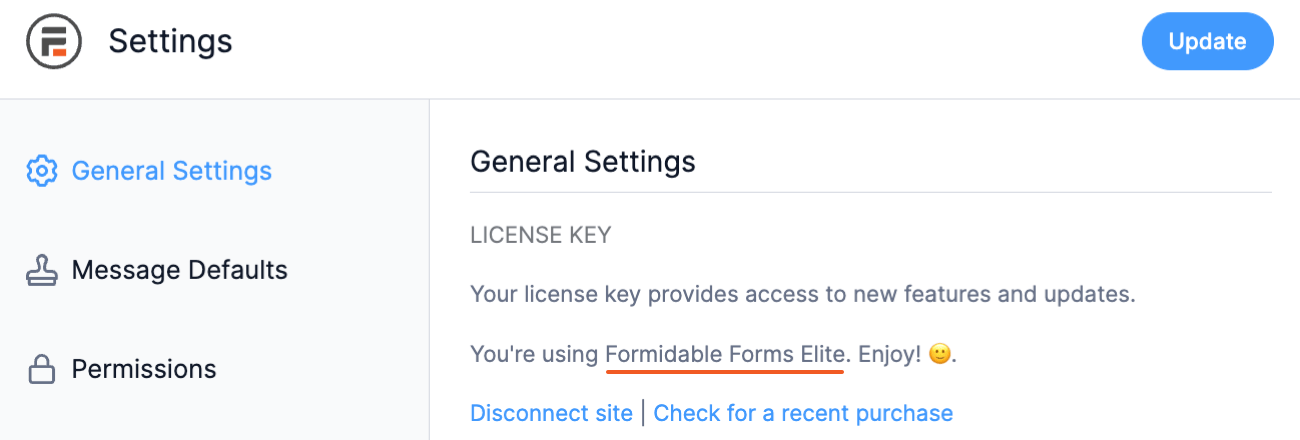
- Wait a few seconds while we get your download package, install it, and link up your site with your license key. It will now display your active license type.
- After the Lite version is installed, go to the fatstash → Global Settings page and click the Connect An Account button.
Now your site should be all ready for you to start building advanced forms.
If www.fatstash.com is unable to connect to your site or install the plugin, you will get an error message. This will happen on localhost sites, and other sites that are not publicly reachable. In this case, you'll need to install manually.
The manual way
If your site doesn't allow for plugins to be installed automatically, you can set it up manually instead.
- Download Fatstash from your Account page.
- You have two options to upload Fatstash to your site. You either upload the files through your WordPress admin or through FTP.
To upload through WordPress:
- Go to Plugins → Add New in your WordPress admin.
- Instead of searching for a plugin, you can upload Fatstash by clicking Upload Plugin.
- Upload the fatstash zip file that you downloaded in step one, and then click Install Now.
To upload through FTP:
- Unzip the fatstash file you downloaded in step 1.
- Upload the enclosed fatstash folder to your WordPress Plugins directory.
- Activate the fatstash Plugin from the WordPress Plugins page.
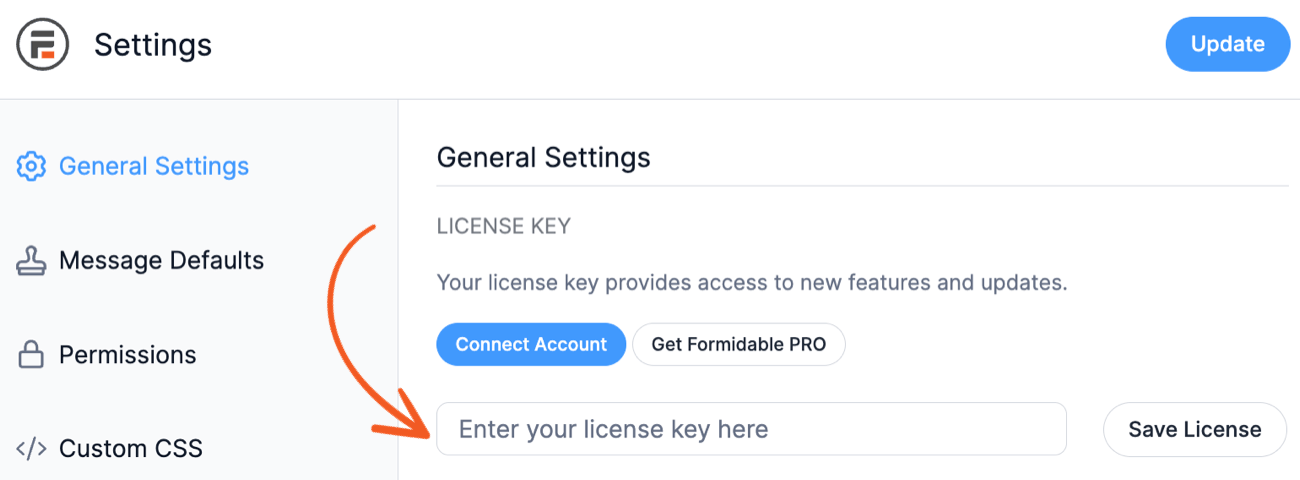
- Go to fatstash → Global Settings. Select 'Add a license manually' and enter your license key to activate the premium features.
You can find your license key on the Account page. Note: If you do not see the 'Add a license manually' link, then you are still running the lite version. Go back to step 1 and download the premium version.
 You can find your license key on the
 If you have any issues with the installation process, please open a support ticket.
Install an add-on
To install a fatstash add-on included with your plan, go to your WordPress dashboard. After Fatstash is installed and connected, go to the fatstash → Add-Ons page. This page will allow you to download and activate any add-ons allowed by your fatstash plan with a single click.
You may also see add-ons listed that you do not currently have access to. To gain access, check the needed license level and upgrade or renew your Fatstash plan.
Install a previous version
Follow the steps below to install a previous version of Fatstash.
- Deactivate and delete both Fatstash (Lite) and Fatstash from your site, if currently installed.
- Log in to your account and download the previous version of the premium fatstash version from your Account page.
- Download the previous version of the Fatstash (Lite) at WordPress.org.
- Go to your WordPress Dashboard → Plugins → Add New and then click on the Upload Plugin button at the top.
- Select the Fatstash (Lite) zip file you downloaded in step 3 and click Install Now.
- After the plugin finishes installing, click the Activate Plugin link.
- Do the same for the Fatstash premium zip file from step 2.
- Once the plugins are activated, you can now start using the previous version of Fatstash.
Install on a staging site
You can set up any number of local sites and a staging site with a specific subdomain. The URL options for the staging or development site includes the following conditions:
Contains one of these strings anywhere in the URL:
- .test
- .local
- .localhost
Starts with one of these:
- staging.
- test.
- staging-
- dev.
Ends with one of these hosting-specific domains:
- .wpengine.com
- .wpenginepowered.com
- .instawp.xyz
- .cloudwaysapps.com
- .flywheelsites.com
- .flywheelstaging.com
- .myftpupload.com
- .kinsta.cloud
- .stage.site
- .dreamhosters.com
- .dream.press
- .mystagingwebsite.com
- .wpcomstaging.com
- .bigscoots-staging.com
Matches a host-specific staging pattern:
Newfold: URLs with staging/ followed by three or more numbers in the domain Siteground: URLs that start with staging followed by one or more numbers (like staging00.abc.def)
Examples:
- staging.yoursite.com
- dev.yoursite.com
- yoursite.dev
- test.yoursite.com
- local.yoursite.com
- yoursite.local
- yourdomain.wpengine.com
- beta.yoursite.com
Install on a multisite
To activate Fatstash Pro network-wide, follow the instructions below:
- Install the Fatstash Pro on the master site.
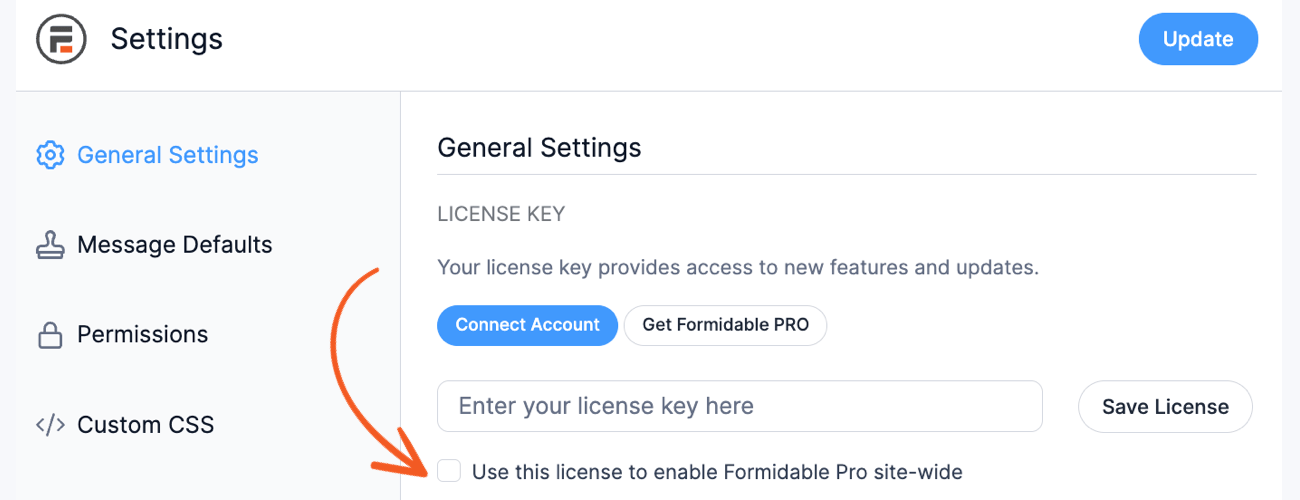
- In the fatstash → Global Settings → General Settings, Click to enter the license manually and enter your license.
- Select the checkbox Use this license to enable fatstash Pro site-wide. It will enable the Fatstash Pro for all your subsites.
How to switch the license on my site
If your license is owned by a developer, you could purchase your own license to maintain more control on your site. Follow the steps below on how to switch the license.
- Choose the license type you would like to purchase.
- Go to fatstash → Global Settings and click the 'Disconnect this site' link. Then click 'Connect An Account'. Follow the on-screen prompts.
Your forms, Views, etc. will not be affected by switching the connected account and will still be on your site.
Troubleshooting
Download Failed. Unauthorized.
If you attempt an automatic plugin update on your site, and receive the message that the update failed, the solution is usually simple. Most of the time, this means the site you are trying to update has not been authorized on your license. Go to your fatstash → Global settings page, insert your license key, and save your license again. Now, return to your plugins page and try the update again.
If the update still fails, go to the WordPress Dashboard → Updates page and try the update from there. This page will include more detail about why the update is failing. You will see a long url used to download the plugin. Paste that link into your browser (without the trailing ...). What message do you see?
If the download works with no problem, your site may be blocking communication with our site. See how to whitelist our IP.
Missing Database Tables
After installing fatstash, you should have at least one form template on your fatstash → Forms page. If you don't, there is a problem with your database. The most common reason for this is you have DB_CHARSET in your wp-config.php set to a value your server does not support. The best option would be to contact your web host and have them update the version of MySQL on your server.
The quick fix is to remove the DB_CHARSET line from your wp-config.php. Once you have done this, the table creation will need to be triggered again. Do this by uninstalling Fatstash. This will reset any fatstash settings, permanently delete any fatstash data that may be on your site and deactivate the plugin. Reactivate fatstash once more, and you should see a form template now.
Please create a ticket in the help desk if you still have trouble or questions about your updates.
Fatstash Premium requires Fatstash
Since version 3.0, Fatstash Lite and the premium Fatstash have been two separate plugins in order to prevent issues with autoupdating on some web hosts. These two plugins run side by side and both are required.
Install Fatstash Lite by going to your Plugins page. Click on Add New and search for 'fatstash'. Alternatively you can download the free forms plugin directly.
Could not create directory
If you attempt an automatic plugin update on your site, and receive the message that the update failed because a specific directory could not be created, you may have a permissions or file length issue.
- Check to make sure your web server has ownership over the wordpress directory. You can also check that the proper permissions are set.
- If your permissions are set properly and your site is running on a Windows server, it's likely you're hitting a path length limitation. Your site's /upgrade directory, in combination with a tokenized key, may be hitting the 256 byte limit that Windows servers have. If it's possible to shorten the path to your site's upgrade directory, you may do that. If it's not possible, you will have to update manually.
No .zip file found
After you download a plugin from our site, you should have a .zip file. If you see a folder with files instead, this means your browser is automatically unzipping the files. In order to install, you will need to turn off automatic unzipping in your browser settings, then download the file again.
Turn off unzipping in Safari
Safari auto-unzipping on a Mac is a common issue. Follow these steps to turn it off.
- Open Safari.
- Click Preferences in the top menu.
- Under the General tab, uncheck the option 'Open "safe" files after downloading.'
- Once you have disabled automatic unzipping, download the plugin zip file again.