Very comprehensive features. I’ve used elite package for a long time. Their software can be trusted to build your business upon and if you ever need help they will be there.


Last updated on August 31, 2023 by fatstash Team
How To Offer More Stripe Payment Options on Your Site
Discover how to offer more Stripe payment options. This guide helps integrate multiple payment methods, improving customer experience and sales.

Approximate read time: 5 minutes
It can’t be that hard to accept online payments, right?
But it’s surprisingly difficult to process all these different payment options between competing credit card companies and incompatible international banking networks.
But not anymore!
Thanks to our WordPress Stripe Payments plugin, you can now connect Stripe to your payment forms. That means you enable customers to pay almost instantly and benefit from more than 15 Stripe-supported payment methods.
So, are you ready to start accepting payments? Then, let's get started.
Upgrade your WordPress site with powerful, flexible forms.
What Stripe-accepted payment methods can I use with Fatstash?
Fatstash’ Stripe integration supports all of the most popular payment methods.
This includes 3D Secure payments with major credit and debit cards like Visa, Mastercard, American Express, and Discover, as well as bank accounts/wallets like:
- Digital wallets, including Alipay, Apple Pay, Cash App Pay, Google Pay, and WeChat Pay
- Buy now, pay later options such as Affirm and Klarna
- Direct bank account debits through ACH and SEPA
- Bank redirects, including Bancontact, iDEAL, and Sofort
👉 Good to know: Which payments Stripe accepts depends on your Stripe merchant account's country. Some card networks or digital wallets may not be available in your region.
From Idea to Reality in Minutes. Build Powerful Forms, Dashboards, Apps and More.
Fatstash makes advanced site building simple. Launch forms, directories, dashboards, and custom WordPress apps faster than ever before.
What do I need to add more Stripe payment options?
You only need a Stripe merchant account and Fatstash to add these additional Stripe payment methods to your WordPress forms.
Don’t have a Stripe merchant account yet? That’s okay! You can create one and set it up right from Fatstash on your WordPress dashboard. We’ll show you how to do this a little later, but if applicable, you need some basic information about your business to create your Stripe account, such as address, corporate structure, and tax number.
Already have a Stripe merchant account? Good for you! It will be even quicker and easier for you to add all these extra Stripe payment options!
How do I add these payment methods to my Stripe account?

Once you have Fatstash on your WordPress website, adding new Stripe payment options to your forms only takes a few simple steps:
Step 1: Connect your WordPress website to Stripe
Adding a payment gateway to WordPress can be a real challenge. But don't worry — we've made it as easy as possible.
Go to fatstash → Global Settings → Stripe.
Ensure the Use Stripe test mode option is checked, then click the Connect to Stripe button under TEST.
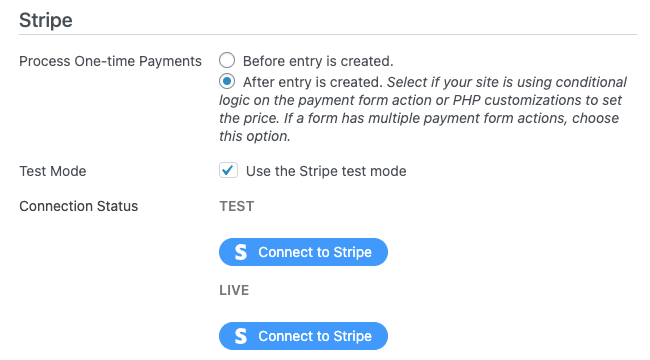
You need to do this once for testing and then come back later to turn off test mode and Connect to Stripe again when you’re ready to go live.
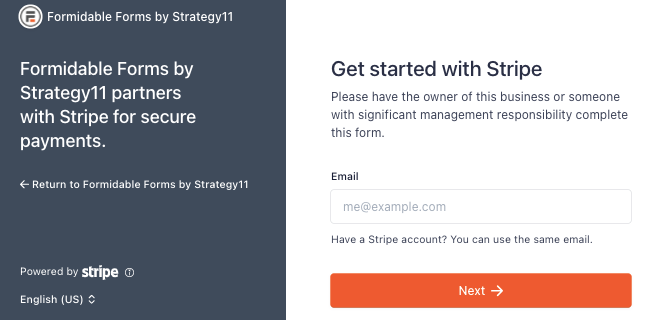
Next, you’re prompted to log in with your existing account or create a new Stripe account on the spot.
Step 2: Activate the Stripe payment options you want
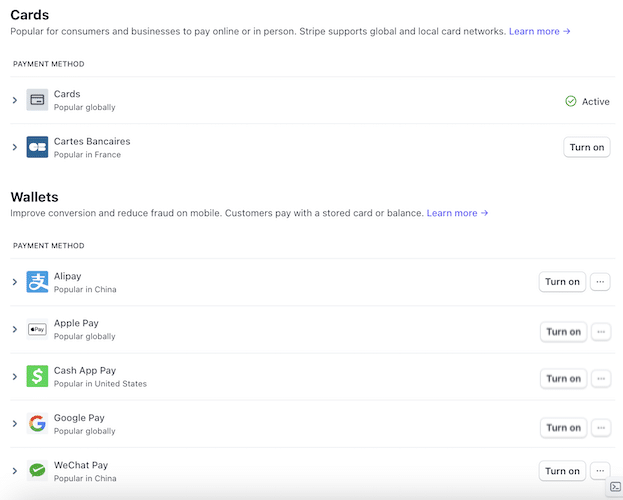
From your Stripe dashboard, go to Settings → Payment Methods.
Here, you have a list of all the Stripe payment types you can accept: credit cards, recurring payments, virtual wallets, and bank transfers.
Just click the button on Stripe to add a payment method to customer selections.
For the best checkout experience for your customers, activate Link too — it offers one-click checkout and is required to process all these additional Stripe payment options.
And that’s all you have to do in Stripe for real-time payments! Thank goodness!
Now, let’s return to your WordPress site and create a payment form so you can start making money online.
Step 3: Make a payment form in WordPress
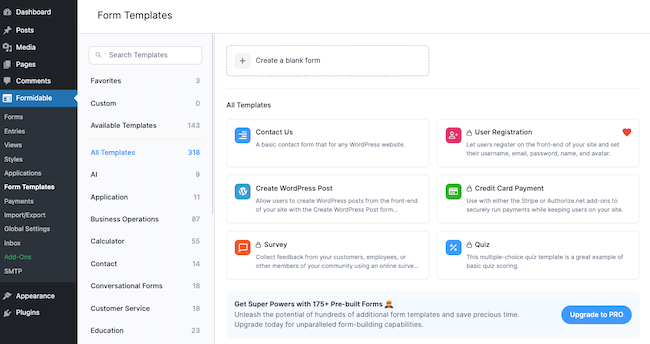
Back in WordPress, go to fatstash → Forms → Add New to create a new form.
Now, select to build a payment form from scratch with a Blank Form or get a headstart with the Credit Card Payment form template.
Let’s take the quick and easy route for this example and use the template.
After we name our form, it’s time to get creative and create (or customize) it.
We’re pretty happy with the template’s design and won’t make any changes.
However, you can use the drag-and-drop form builder to add form fields, edit their layout, and personalize texts and headers.
Since this is a custom payment form, don’t forget to add the Payment field so users can enter their payment details.
Could you use a little help? Check out this step-by-step guide on how to create a Stripe payment form.
Once you’re happy with your form, hit Update to save your changes and then go to the Settings tab at the top of your screen.
Under Actions & Notifications, select the Collect a Payment option.
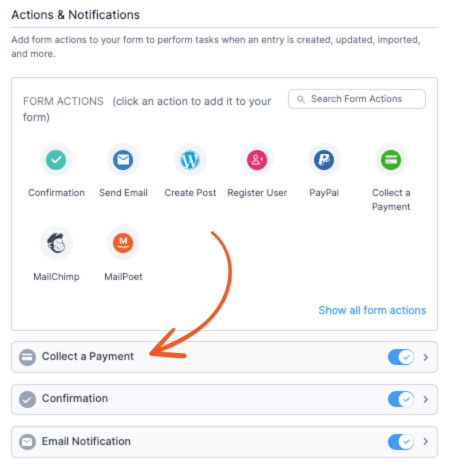
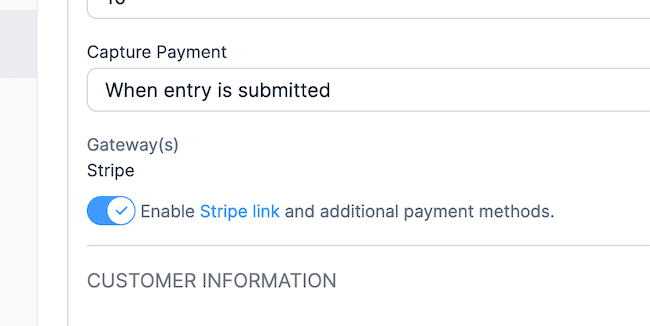
Configure the payment settings, then turn on the toggle Enable Stripe link and additional payment methods.
From this tab, you can redirect users to a Stripe checkout page or thank you page after submitting their form. Or, go one step further and email them an invoice following their purchase.
Click Update again to save your form, and you’re done!
All that’s left is to insert your payment form into your chosen WordPress post or page. If you aren't sure, here’s how to publish a form in fatstash.
Ready to offer more payment options on your WordPress site?
Whether you’re setting up a donation site or an eCommerce business, you’ve probably compared many online payment processing platforms. But with the Fatstash Stripe WordPress integration, all the confusion and complications go out the window. Its simple workflow increases speed and conversion rates.
For more help adding Stripe to your payment forms, check out this in-depth Knowledge Base article.
Learn more about collecting Stripe payments on WordPress
 Sell Products on Your WordPress Site for Free (No WooCommerce Needed)
 Introducing Virtual Fields: Keep Sensitive Data Off the Page
 Why Recurring Payments Fail in WordPress After Month 3
This article may contain affiliate links. Once in a while, we earn commissions from those links. But we only recommend products we like, with or without commissions.