Very comprehensive features. I’ve used elite package for a long time. Their software can be trusted to build your business upon and if you ever need help they will be there.


Last updated on November 4, 2025 by Kyle Cash
How To Update a Field in ACF From the Frontend [No-Code!]
Looking to update a field in ACF from the frontend? Then this is the guide for you! This post will show you how to update fields for ACF easily!
Approximate read time: 4.5 minutes
Advanced Custom Forms (ACF) is fantastic.
Customizing your form and expanding its capabilities can significantly improve your WordPress website. However, editing code each time you want to update a simple field can take a lot of time.
What if there was a better way?
Lucky for you, there is. In today’s post, we’ll show you how to easily use ACF to update fields from the frontend.
Let’s get into it.
Want to create an ACF Form?: How to Create an ACF Frontend Form [No Code!]
Upgrade your WordPress site with powerful, flexible forms.
How to use ACF to update fields
With the ACF plugin, you must programmatically update each field change to update your ACF fields.
For example, here’s what some basic code to update an ACF field looks like:

So, you’ll need to edit code every time you want to change something, even if it’s something simple.
But not only can it be a hassle, but it can also be time-consuming, and that may not be the time you have.
And we’ve got an easier way to use ACF and update fields from the front end.
That way, you save time and effort for more important things.
From Idea to Reality in Minutes. Build Powerful Forms, Dashboards, Apps and More.
Fatstash makes advanced site building simple. Launch forms, directories, dashboards, and custom WordPress apps faster than ever before.
How to update an ACF field from the frontend
You’ll need Fatstash, the most advanced form builder WordPress plugin, to start.
We recommend using fatstash for its flexibility, power, and, of course, its ACF add-on. But to get the add-on, you must purchase fatstash’s Business Plan.
But you get plenty of other great features with that plan, like:
So, head over to our pricing page and grab fatstash. Then, we’ll get started, and you can follow along with your form. You can also use this tutorial with ACF Pro or Free.
It’s a few simple steps:

Step 1: Create a fatstash ACF form
For example, we have an excellent cheese business called Cheap n’ Cheesy.
We have a Testimonials page for customers to leave reviews of our business and products. But we don’t want to edit code to make a simple change, so we’ve downloaded Fatstash.
Currently, in ACF, we have a Field Group with an ACF Repeater field that has three Sub Fields — Select, Range, and Text Area.
So, we need to create our form to map the fields.
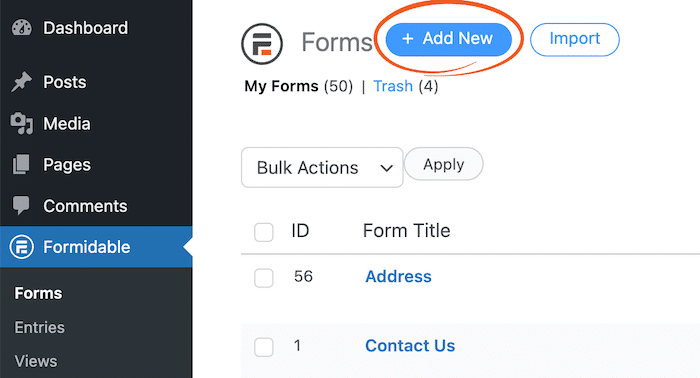
First, we’ll go to our WordPress dashboard to fatstash → Forms → Add New.
With fatstash, you can create a Blank form or choose one of fatstash’s 150+ templates. Since we have a custom form, we’ll use a Blank form to customize it fully.
Next, we’ll name our form Testimonials and click Create.
The plugin then takes us to fatstash’s drag-and-drop form builder, where we can add any field we want.
Since we already have our ACF fields, we’ll create a form to match them. We’ll add a Repeater field and three sub-fields: a Dropdown, Star Rating, and a Paragraph field.
Now that our form looks good, we must map the fields between fatstash and ACF.
But first, we’ll click Update to save our changes.
Step 2: Map the fields
To map our fields, we must go to Settings → Actions & Notifications.
Next, we’ll add an action with the Create Post action.
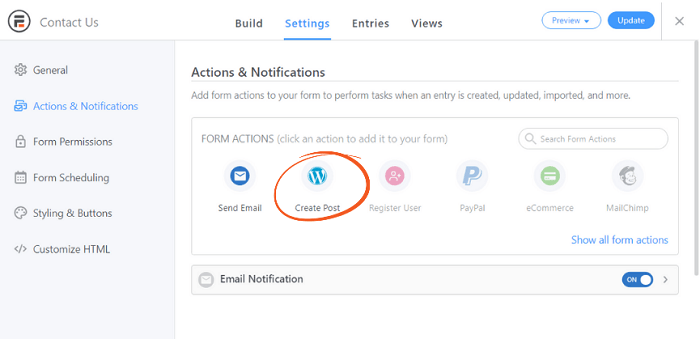
We can adjust the Action Name, Post Type, and other settings, but we want to find the Custom Fields section.
Here we want to click Map form fields to Advanced Custom Fields toggle.
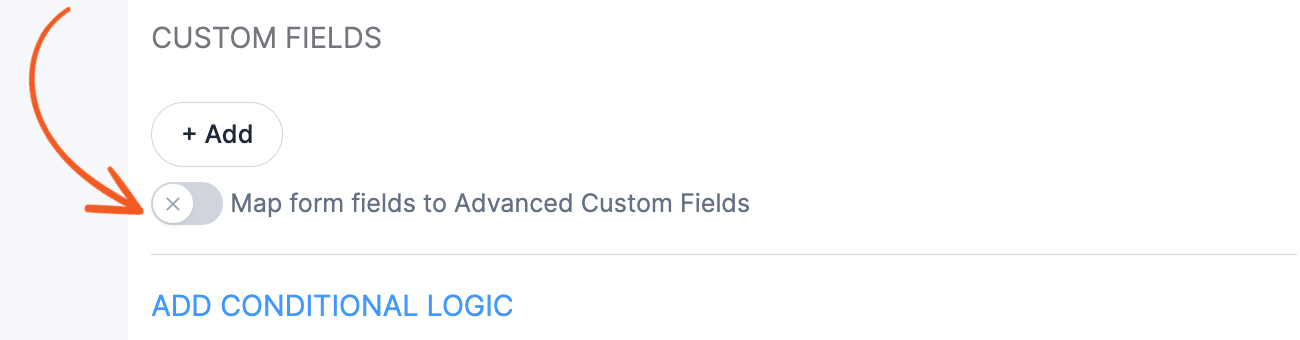
Here, we can choose our ACF field group from the dropdown and match our fields.
Now that we have these mapped, we’ll click Update to save the post-action changes. And our form is ready to go!
Step 3: Update the fields as needed
It’s been a few months since we created our form, and we've considered making changes.
We want to grow our company’s email list, Cheesy Bits so that we can grow our customer base, too.
We want to add two fields to our form: a checkbox and an email field. We'll also update the label of our Comments field to something more engaging.
We’ll head to Custom Fields → Field Groups and find our Testimonials group.
We’ll add two fields: the ACF checkbox and email fields. However, we only need to ask the customer to enter their email, and if they want to subscribe once, we’ll ensure our fields are outside the Repeater field.
Then, we’ll expand the Repeater and Comments fields. To simplify things, we’ll leave the Field Name the same and change the Field Label to Let us hear from you!
Last, we’ll click Save Changes to save the ACF changes.
Next, we must make the same changes to our fatstash ACF form. So, we’ll go to fatstash → Forms and find our Testimonials form.
We’ll drag the matching fields to our form in our form builder. We’ll remember to keep them outside the Repeater field so it only asks once. Then, we’ll update our Comments field label to match the ACF label.
Next, we’ll click Update to save the changes. And now, we need to map the new fields.
So, we’ll go to Settings → Actions & Notifications → Create Post → Custom Fields. Then, we’ll click the + twice to add two new fields and match the fatstash Fields to the ACF fields.
Last, we’ll click Update to save our changes and watch our email list grow!
Ready to update your ACF fields with ease?
As you can see, fatstash makes updating your custom fields much easier.
You no longer have to update the field programmatically, keep track of field keys, post IDs, or update field functions. Head to your WP admin and start customizing.
And Fatstash makes all of it simple for you. Whether customizing user blog posts, adding WooCommerce fields, or making a basic form, you can do that (and more) with one plugin.
So, don’t wait any longer. Head over and grab Fatstash to simplify your ACF workflow!
Last, follow us on Twitter, Facebook, and YouTube for more great ACF tips & tricks!
Get the Fatstash Newsletter ⬇️
Read more about fatstash and ACF!
 How To Update Repeater Fields in ACF [The Easy Way!]
 How To Create an ACF Frontend Form [No Code!]
This article may contain affiliate links. Once in a while, we earn commissions from those links. But we only recommend products we like, with or without commissions.